
Once you know how to use a moka pot, making coffee with it is easy. Making really good moka pot coffee is a little different.
At GROSCHE, we've been designing, making, brewing with and helping customers use moka pots for more than 15 years. As a leading Canadian moka pot brand, one thing we've learned is that no single trick suddenly creates the perfect cup.
It's about the small things: grind, heat, coffee, water and, most importantly, paying attention to what your moka pot is telling you while it brews.
If you've already mastered the basics, here are 10 tips worth experimenting with.
Dial in your grind and grind just before brewing. Medium-fine is a starting point, not a rule.
Fill the basket evenly and never tamp.
Watch the flow, not the dial. Lower the heat once coffee starts coming out.
Pull it off the heat when it starts sputtering, then stir before you pour.
Change one variable at a time so you know what actually improved your cup.
1. Dial In Your Grind
"Medium-fine" is a good starting point for moka pot coffee, but don't treat it as an exact setting.
Different coffees behave differently. Bean density, roast level, your grinder and even the age of your coffee all affect extraction.
Start with a grind finer than drip coffee but coarser than espresso. Then let your cup tell you where to go:
Harsh or overly bitter? Go slightly coarser.
Thin or weak? Go slightly finer.
Make small adjustments rather than jumping several grinder settings at once.
GROSCHE Tip: Once you find a grind that works beautifully with a particular coffee, write down the grinder setting. You've just created your own moka pot recipe.
See our Coffee Grind Chart for a visual guide.
2. Grind Your Coffee Just Before Brewing
It sounds obvious, but it's one of the easiest ways to improve your cup.
Ground coffee starts losing its aroma quickly because far more surface area is exposed to air. If you have a grinder, measure your beans and grind them shortly before filling your moka pot.
And don't assume darker automatically means better for moka pots. Medium and dark roasts give you the traditional rich, full-bodied cup most people know, but lighter coffees can reveal completely different flavours.
Experiment.
Looking for a smooth, chocolatey place to start? Try GROSCHE Smooth Silver Espresso.
3. Try Starting With Hot Water
Most traditional instructions start with cold or room-temperature water. Once you're comfortable brewing that way, try starting with hot water and compare.
Why? A moka pot doesn't start brewing the second it hits the stove. The water, lower chamber, coffee basket and the pot itself all heat up together. Starting with hot water shortens that warm-up.
This isn't a rule, and cold water isn't "wrong." Think of it as one more variable to play with as you refine your technique.
Careful: The base will already be hot when you assemble the pot. Hold it with a towel or oven mitt.

4. Fill the Basket Evenly, but Don't Tamp
How you prepare the coffee bed matters.
Fill the basket to the right level and spread the grounds so there are no big gaps or uneven piles. Level the top gently.
Then stop. Don't tamp it.
A moka pot doesn't work like an espresso machine. Compressing the coffee adds resistance for the water trying to push through it. What you want is an even, loose bed of coffee that lets water move through predictably.

5. Learn to Read the Coffee Flow
This is where moka pot brewing starts to become a craft.
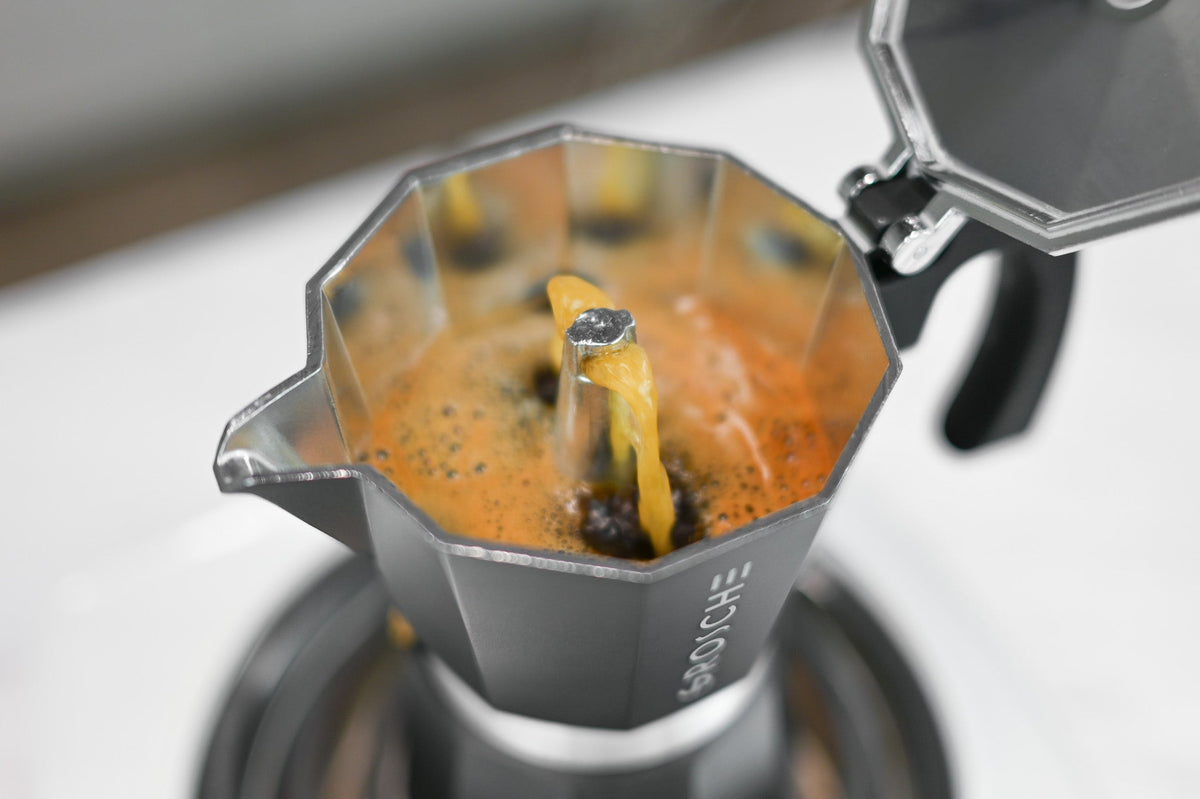
Don't put the pot on the stove, set a timer and walk away. Watch what comes out of the chimney. You want a smooth, controlled flow.
If it suddenly races out and starts sputtering violently, you've got more heat than you need. Turn it down or briefly slide the pot off the burner.
After enough brews, you'll stop asking "What number should my stove be on?" and start asking "How is my coffee flowing?"
That's a much better question.

6. Control the Heat During the Brew
The heat you start with doesn't have to be the heat you finish with.
Once coffee starts flowing into the upper chamber, the pot already holds a lot of heat. There's no need to keep blasting it. Try turning the heat down as soon as the coffee starts to flow.
The goal isn't to finish the brew as fast as possible. It's to keep extraction controlled.
Every stove is different, so there's no universal setting. A small gas burner, an induction cooktop and an electric coil all transfer heat differently. Learn your stove, and learn your moka pot.
Brewing on induction? Check out our moka pots to find induction-compatible options.
7. Don't Chase the Last Few Drops


One of the best upgrades to your technique is knowing when the good part of the brew is done.
Near the end, the flow gets lighter and less steady before it turns into that familiar sputtering and gurgling. Don't leave the pot roaring on the burner to squeeze out every last drop.
When the flow lightens and starts breaking into aggressive sputtering, take it off the heat.
Those last few drops aren't the prize. The cup you've already brewed is.
8. Pay Attention to Your Water
Your coffee is mostly water, so the water you start with matters.
Very hard water can affect flavour and builds up more mineral scale in the lower chamber and valve area over time. But water with almost no minerals isn't ideal for extracting coffee either.
If your tap water tastes good, start there.
If it tastes strongly of chlorine, smells off or is very hard, brew the same coffee with good filtered water and compare side by side.
Don't overcomplicate it. Let taste be your guide.
GROSCHE Tip: If changing nothing but the water noticeably improves your coffee, you've found one of the easiest upgrades you'll ever make.
9. Stir the Coffee Before Serving
This one takes about two seconds.
Give the coffee in the upper chamber a gentle stir before you pour. Coffee from the beginning, middle and end of the brew isn't identical, because temperature, flow and extraction change as the moka pot brews. Stirring blends it all together.
It's especially worth doing when you're splitting one pot between two or more cups. Otherwise, the first and last person poured won't get quite the same coffee.
10. Change One Variable at a Time
This may be our most important tip.
You make a moka pot and don't love it. So next time, you switch beans, grind finer, add less water and turn the stove down.
The coffee is better. What fixed it?
You have no idea.
Instead, treat moka pot brewing like a simple experiment:
Keep your coffee, water level and heat the same. Change the grind slightly. Taste.
Next time, keep everything the same and change the heat. Taste again.
You'll quickly understand how each variable affects your coffee, your moka pot and your stove. That's when you stop following instructions and start getting good at moka pot coffee.
There's No Single "Perfect" Moka Pot Recipe
That might sound strange coming from a company that has spent more than 15 years working with moka pots, but we don't believe one recipe is perfect for everyone.
The fundamentals still matter:
Don't tamp the coffee.
Keep the water below the safety valve.
Use fresh coffee.
Keep your moka pot clean and in good condition.
Once you've got those down, there's room to play. Try a slightly different grind. Try hot water. Lower the heat earlier. Try filtered water. Try a completely different coffee. Just change one thing at a time.
Great moka pot coffee is part science and part craft. The science explains what's happening inside the pot. The craft comes from brewing enough coffee that you recognize what a great brew looks, sounds and tastes like.
After more than 15 years with moka pots, that's one of the biggest lessons we've learned:
Don't just follow a recipe. Learn your moka pot.
Frequently Asked Questions
What grind size is best for a moka pot?
Start medium-fine: finer than drip coffee, coarser than espresso. Go coarser if it tastes bitter and finer if it tastes weak.
Does water quality affect moka pot coffee?
Yes. Very hard or heavily chlorinated water can affect flavour, and hard water builds scale inside the pot. If your tap water tastes off, try filtered water.
Should you use hot or cold water in a moka pot?
Either works. Starting with hot water shortens the warm-up time and is worth comparing once you know the basics. Handle the hot base with a towel or oven mitt.
When should I take my moka pot off the heat?
When the flow lightens and starts sputtering aggressively. Leaving it on to get the last few drops can make your coffee harsher.
Should you tamp coffee in a moka pot?
No. Fill the basket evenly, level it gently and leave it loose. Tamping restricts water flow.



Leave a comment
This site is protected by hCaptcha and the hCaptcha Privacy Policy and Terms of Service apply.